
First I wanted to mention the link problems inside Azure Portals.
For a while and for some people portal.azure.com didn’t show the Authentication strengths in their portal, this has now been fixed in normal Azure portal.
Entra portal on the other hand worked correctly the whole time.
Then to the subject in hand.
Table of Contents
Why?
Multi-factor authentication is excellent security feature, in the most simplified scenario you need your Username and Password + some form of proof that you are really doing the sign-in to a service.
But if you go where the fence is the lowest or implemented MFA ages ago and didn’t take care of the methods it’s uses after that. You could be facing the risks of MFA fatigue.
MFA fatigue means that after attacker will phish your credentials and once they do, they will sign-in to a service of their wishing and bombard you with endless swarm of MFA request until you accept the request.
To make the sign-in’s visible for your users please enable these.
Then educate your users, it’s makes the deployment a lot longer but it’s worth it, I promise you.
What?
The Conditional Access feature has been upgraded to enable administrators to specify the MFA technique to be utilized as well as request multi-factor authentication (MFA) or not, depending on the application.
I will demo one type of Phishing resistant method called Certificate Based Authentication (CBA)
You can access the new feature from here
And define CBA from here https://aka.ms/ad/auth or the long URL https://entra.microsoft.com/#view/Microsoft_AAD_IAM/AuthenticationMethodsMenuBlade/~/AdminAuthMethods
For these shorts I wanted to mention this by @merill
And also Graph X-ray, which will give you visibility to the underlying commands.
A hackathon project built with ❤️ by Eunice, Dhruv, Clement, Monica & @merill.
Enabling CBA
Open your Entra admin center and enable CBA

And then

Or with PowerShell and Graph
|
1 2 3 4 5 6 7 8 9 10 11 12 13 14 15 |
Import-Module Microsoft.Graph.Identity.SignIns $params = @{ "@odata.type" = "#microsoft.graph.x509CertificateAuthenticationMethodConfiguration" Id = "X509Certificate" CertificateUserBindings = @( ) IncludeTargets = @( ) ExcludeTargets = @( ) State = "enabled" } Update-MgPolicyAuthenticationMethodPolicyAuthenticationMethodConfiguration -AuthenticationMethodConfigurationId $authenticationMethodConfigurationId -BodyParameter $params |
Or just graph
|
1 |
PATCH https://graph.microsoft.com/beta/policies/authenticationmethodspolicy/authenticationMethodConfigurations/X509Certificate |
Feature highlights
- Facilitates on-boarding to Azure quickly without being delayed by additional on-premises infrastructure to support certificate-based authentication in public and United States Government clouds.
- Provides support for unphishable multi-factor authentication.
- Supports user sign-in against cloud Azure AD using X.509 certificates into all web browser-based applications and into Microsoft Office client applications that use modern authentication.
- The feature works seamlessly with Conditional Access features such as MFA to help secure your users.
- It’s a free feature, and you don’t need any paid editions of Azure AD to use it.
- Eliminates the need for federated AD FS and reduces the cost and on-premises footprint.
How the authentication works?

How to setup?
If You just open the CBA page and select Add rule, You will get a warning.

And this is because You have to first add the Certification Authority’s CRL distribution point with PowerShell.
In my example I used my own PKI which I published with Application Proxy.
Here’s an excellent article from Michael Niehaus on publishing Certificate Revocation Lists with Application proxy.

I will just make couple of additions. You can use Your own custom domain by adding the FQDN to custom domains. If You already have the suffix just add the prefix and don’t have to even verify it.

And here the PowerShell One-liner Michael is using.
|
1 |
New-AzureADApplicationProxyApplication -DisplayName "MyApplicationName" -ExternalUrl "http://YourPreferredFQDN/certenroll/" -InternalUrl "http://YourCAName/certenroll/" -ExternalAuthenticationType Passthru |
And last but not least, You can now add HTTP redirection also.

So Finally You will have these inside Your CA-Root extensions.

Continuing the setup
You will find the CRL point from the certificate that was generated under CRL Distribution Points field.

And for AIA also

Trusted CA’s
PowerShell
Adding the you root-ca with PowerShell
|
1 2 3 4 5 6 |
$cert=Get-Content -Encoding byte "YourPath\YourCA-root.cer" $new_ca=New-Object -TypeName Microsoft.Open.AzureAD.Model.CertificateAuthorityInformation $new_ca.AuthorityType=0 $new_ca.TrustedCertificate=$cert $new_ca.crlDistributionPoint="http://mycrl.cloudpartnerdemo.fi/CertEnroll/myca.crl" New-AzureADTrustedCertificateAuthority -CertificateAuthorityInformation $new_ca |
When You run the commands.

Or with GUI
Previously we didn’t have a possibility to add certificates with GUI but not there is.
First you have export your ca-root cert as .cer (x.509) and upload it to Azure and select the CRL URL’s + CRL filename
Yes, I will show my CRL’s here, not to worry, the certificates have already been revoked.

Once done, it will look like this.

When You have Certificate and CRL published, You can go and select the certificate.

Once You add the rule You will see the selected certificate.

You can select default protection level between Single or Multi-factor.

Understanding the username binding policy
The username binding policy helps locate the user in the tenant. By default, Subject Alternate Name (SAN) Principal Name in the certificate is mapped to onPremisesUserPrincipalName attribute of the user object to determine the user.
An administrator can override the default and create a custom mapping. Currently, we support two certificate fields SAN Principal Name and SAN RFC822Name to map against the user object attribute userPrincipalName and onPremisesUserPrincipalName.
Rules applied for user bindings:
Use the highest priority (lowest number) binding.
- If the X.509 certificate field is on the presented certificate, try to look up the user by using the value in the specified field.
- If a unique user is found, authenticate the user.
- If a unique user is not found, authentication fails.
- If the X.509 certificate field is not on the presented certificate, move to the next priority binding.
- If the specified X.509 certificate field is found on the certificate, but Azure AD does not find a user object in the directory matching that value, the authentication fails. Azure AD does not attempt to use the next binding in the list in this case.
To flat the explanation out, You will sign in with the user having an account inside Azure AD and requesting a certificate for that user, When you have the users UserPrincipalName inside the certificate, You can logon with it.

Supported scenarios
The following scenarios are supported:
- User sign-ins to web browser-based applications on all platforms.
- User sign-ins on mobile native browsers.
- Support for granular authentication rules for multifactor authentication by using the certificate issuer Subject and policy OIDs.
- Configuring certificate-to-user account bindings by using the certificate Subject Alternate Name (SAN) principal name and SAN RFC822 name.
Unsupported scenarios
The following scenarios aren’t supported:
- Public Key Infrastructure for creating client certificates. Customers need to configure their own Public Key Infrastructure (PKI) and provision certificates to their users and devices.
- Certificate Authority hints aren’t supported, so the list of certificates that appears for users in the UI isn’t scoped.
- Windows login using smart cards on Windows devices.
- Only one CRL Distribution Point (CDP) for a trusted CA is supported.
- The CDP can be only HTTP URLs. We don’t support Online Certificate Status Protocol (OCSP), or Lightweight Directory Access Protocol (LDAP) URLs.
- Configuring other certificate-to-user account bindings, such as using the subject field, or keyid and issuer, aren’t available in this release.
- Currently, password can’t be disabled when CBA is enabled and the option to sign in using a password is displayed.
Authentication strengths
You can find the new strengths under auth methods.

Just add a new strength and choose CBA (Multi-Factor)

Click next and create. Now a have the strength

You need to enforce it with CA policies
Conditional Access policy
Once you the CBA method enabled, you must attach it to a Conditional access policy to be effective.

You can also list the available methods with Graph
|
1 |
GET https://graph.microsoft.com/beta/identity/conditionalAccess/authenticationStrengths/policies |
Or again with PowerShell and Graph
|
1 2 3 |
Import-Module Microsoft.Graph.Identity.SignIns Get-MgIdentityConditionalAccessAuthenticationStrengthPolicy |
Enable it or put it to reporting mode to see what will happen once enabled.

End-user experience
User logins to cloud apps and they will see the normal “More information required” if they don’t have MFA registered

And once they register their MFA, they will be prompted for the method you specified.

Request a certificate and let’s try again. Login again to portal.office.com

And select the User certificate generated by the CA and Success!

What about enabling CBA and Temporary password (Multi-use)?

User can sign-in with temporary pass, what if the use is signing in with their normal password?
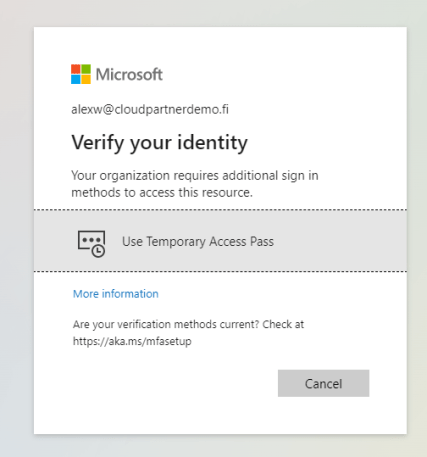
But they can choose the CBA also

And success!

Logs
And you will see login inside the sign-in logs

CA details can be found under Conditional Access

And can see what happened with CA policies

Closure
With authentication strength we can define the must have methods for sign-in to an application and that’s the real beauty of the feature.
The end-user will be displayed the ones that are supported and can choose one of them.


 RSS - Posts