
First covering why I wrote this article, well this is one reason

And another reason is that PowerShell 7.2 came out in public preview.
All old things must come to an end, well at least with Cloud services as they evolve all the time.
Next year (30th September 2023) it’s time to retire Run-As automation accounts.
Also Azure Service Manager (ASM) will be fully retired on 1st March 2023. the year after (31st August 2024) Cloud Services (classic) deployment model will meet their end of the road and VMs created using the classic deployment model will follow the Modern Lifecycle Policy for retirement.
So lot’s and lot’s of changes coming but I will concentrate on the Automation accounts and how to switch it to a Managed Identity.
Table of Contents
What is Azure Automation Account?
Azure Automation Account let’s You automate Your tasks for cloud-based automation, operating system updates, and configuration service that supports consistent management across your Azure and non-Azure environments. It includes process automation, configuration management, update management, shared capabilities, and heterogeneous features.
Authentication overview
HTTP webhook or API methods
These service can trigger Automation Runbook with HTTP webhook or API method:
Here is an excellent article on how it works from those services.

How to find those run as accounts?
Microsoft has this script to find service principals and all automation accounts running under system or user-assigned identities.
How to setup Automation Account?
Search for Automation Accounts.

Click create new.

Select subscription and resource group, then give it a name and where the data will reside.

Select System Managed identity or If You want You can also use User Assigned.

Private Endpoint
Choose public or private, which ever suits Your needs.

If You want to choose private access, You need to provide a Private Endpoint for it. Define Private DNS integration also for connecting from internal resources.

What is a Webhook?
Schedules are excellent if you want a job to run at a certain time, but if you want a job to run in response to a specific event or when a user triggers it, that’s when Webhooks come to picture. A pretty common method for leveraging an HTTP request to activate things is using webhooks. This implies that a job can be started by any system that can send an HTTP request.
How Private endpoint works?
Here is an illustration by Microsoft on what it can do. When you have an resource, you can connect to Automation account and run a Webhook to kick-off a tasks inside with Automation accounts.
Just to be specific, Automation account don’t do anything the other way around.

Here is the full article.
Continuing the setup
But for my demo and use case I will use public.

When the resource have been created, click Go to resource.

What can you automate?
There a lot of option you could automate. In example PowerShell 7.2 and Python 3.10 just came to Public preview phase.
And I will choose the easiest one for me as example.
PowerShell scripts
Before You had to schedule PowerShell scripts from Your task scheduler inside servers or workstations but now that has changed, You can run Your favorite scripts directly from Azure with Automation Accounts and runbooks.
Configuration steps
First You have to import PowerShell modules You want to use inside the Runbook
Importing Modules
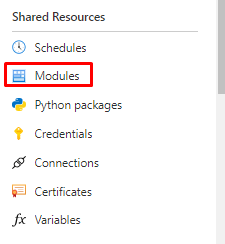
Open shared resources -> Modules
In here you can filter with the module versions. Let’s try choosing 7.2

You can also add Your own modules if needed.

But I will use default ones for my example. Open browse gallery.

And search for Microsoft.graph

And MSAL.PS

And for demonstrative reason, Fellow MVP’s Darren “Doc” Robinson’s JWT Details

If you want to do some Desired States for your M365, there is also a Microsoft365DSC module available.

In here You can search for commands in inside the module to see if it’s the right one for You. If You are happy You can choose select. Except for Graph there isn’t anything here but in example for M365DSC there is.

Select runtime to 7.2

Importing will take about 5mins, so have patience.

And done

Run as and Managed-identities
What is the purpose for these accounts?
Service principals and managed identities serve one purpose, connecting to Azure resource from the runbooks.
Run as
Under Run as account you will the notification, you can still create them but better not to.

The old way with Run as accounts was like this.

And with the new you will just add a Managed identity, instead of App registration.
For System-managed identity

And for User-managed Identity

Automation credentials
We will be using a little bit different approach because we connecting to Microsoft Graph
First create an App registration for generating a bearer token (Won’t be covering this but I will in the upcoming posts for sure)
Runbook
Quick tip! If you want to use pre-defined workbooks, you can find them here.

And use them directly from Azure portal from here.

Again continuing the setup
Open Process Automation -> Runbooks and Create a runbook.

Give it a name, choose Runbook type to PowerShell and version to 5.1 (I will also create runbooks for PowerShell versions 7.1 and 7.1)

Or 7.1 and 7.2
Implementing the code
In the next screen You can see all the resources You specified for the runbook. Runbook is based on the version you specified when creating it. If you have many different versions, import those modules to all of them.
My Runbook looks like this. I added the secret things to variables.

And as a note, always encrypt them variables!
Like this.

It’s also suggested in AzPolicyAdvertizer
But I will just put my code and click Save. I will use this one in my test.
|
1 2 3 4 5 6 7 8 9 10 |
($PSVersionTable).psversion $clientid = Get-AutomationVariable -Name 'ClientID' $clientsecret = Get-AutomationVariable -Name 'ClientSecret' $tenantid = Get-AutomationVariable -Name 'TenantID' $myAccessToken = Get-MsalToken -ClientId $clientID -TenantId $tenantID -ClientSecret (ConvertTo-SecureString $ClientSecret -AsPlainText -Force) # Inspect the Access Token using JWTDetails PowerShell Module $myAccessToken.AccessToken | Get-JWTDetails |
And then Test plane.
5.1 works

How about 7.1, success!

So, how is the biggest sister doing, not that well.

Well, after all it’s still under preview and just came out but when it comes out from Preview it will be mature enough to run those 7.2 cmdlets.
When the test is done, You have to publish to make a schedule.

Scheduling
Choose Shared Resources -> Schedules -> Add a schedule.

You can choose start date and time, when does it trigger after the first run. And choose to set expiration or not.

And yes, didn’t yet use Microsoft Graph modules, will cover this in some of next posts.
Audit logs in the destination
When You run the Runbook and the process is completed, If you specified a specific User to run that script, you will see it like this under User-Agent type.

Closure
Why using managed identities is more secure compared to the old style? On thing for sure is that there isn’t any passwords for the identity. And like we see you can assign system or user-assigned identities just like Service principals as we saw in this post.
That’s all I had for this post. Hopefully You found it useful to Your own projects or just for learning purposes. Easy as that!

 RSS - Posts