
And to the next section from SC-300 study guide, now covering:
- implement and manage Azure Active Directory Connect (AADC)
- implement and manage Azure AD Connect cloud sync
- implement and manage Password Hash Synchronization (PHS)
Table of Contents
Implement and manage Azure Active Directory Connect (AADC)
Installation prerequisites
- Azure AD Connect must be installed on a domain-joined Windows Server 2016 or later.
- The minimum .NET Framework version required is 4.6.2, and newer versions of .NET are also supported.
- Azure AD Connect can’t be installed on Small Business Server or Windows Server Essentials before 2019 (Windows Server Essentials 2019 is supported). The server must be using Windows Server standard or better.
- The Azure AD Connect server must have a full GUI installed. Installing Azure AD Connect on Windows Server Core isn’t supported.
- The Azure AD Connect server must not have PowerShell Transcription Group Policy enabled if you use the Azure AD Connect wizard to manage Active Directory Federation Services (AD FS) configuration. You can enable PowerShell transcription if you use the Azure AD Connect wizard to manage sync configuration.
- It is not supported to break and analyze traffic between Azure AD Connect and Azure AD. Doing so may disrupt the service.
- If your global administrators have MFA enabled, the URL https://secure.aadcdn.microsoftonline-p.com must be in the trusted sites list. You’re prompted to add this site to the trusted sites list when you’re prompted for an MFA challenge and it hasn’t been added before. You can use Internet Explorer to add it to your trusted sites.
Accounts
- You must have an Azure AD Global Administrator account or Hybrid Identity Administrator roles for the Azure AD tenant you want to integrate with. This account must be a school or organization account and can’t be a Microsoft account.
- If you use express settings or upgrade from DirSync, you must have an Enterprise Administrator account for your on-premises Active Directory.
Choosing install type
Express
- You have a single Active Directory forest on-premises.
- You have an enterprise administrator account you can use for the installation.
- You have less than 100,000 objects in your on-premises Active Directory.
Custom
- You do not have access to an enterprise admin account in Active Directory.
- You have more than one forest or you plan to synchronize more than one forest in the future.
- You have domains in your forest not reachable from the Connect server.
- You plan to use federation or pass-through authentication for user sign-in.
- You have more than 100,000 objects and need to use a full SQL Server.
- You plan to use group-based filtering and not only domain or OU-based filtering.
In my example I will start with Express for demonstrative purposes.
Express settings


By default it will configure the following.


Initial sync and aftermath
When the initial sync is done, You can see the users in the portal and all except one have wrong UPN suffix.

The one having a right one has the right Suffix inside local AD.

and the rest only the local domain.

So You can sync users to the cloud but they will be created with default tenant name suffix, not good.
Adding UPN and modifying the users
From old habits I always add the UPN from Domains and Trusts, then properties.

Add Your domain and hit OK.

If You don’t already have Your Custom Domain inside Azure AD, now it’s the time to add it.
Changing user Suffixes
Select all, properties and change the UPN to all at once.

Open PowerShell and run.
|
1 |
Start-ADSyncSyncCycle -PolicyType Delta -Verbose |
You can also run -PolicyType Initial but there’s no sense at this point.
Search for Synchronization Service

And You will see the syncing happening.

And there is updates.

Success!

Troubleshooting
You use Synchronization Service Manager to debug the sync.

Or metaverse search to find users and their attributes.


Implement and manage Azure AD Connect cloud sync
With Azure AD Connect cloud sync, provisioning from AD to Azure AD is orchestrated in Microsoft Online Services. An organization only needs to deploy, in their on-premises or IaaS-hosted environment, a light-weight agent that acts as a bridge between Azure AD and AD. The provisioning configuration is stored in Azure AD and managed as part of the service.
Installation prerequisites
- Identify a domain-joined host server running Windows Server 2016 or greater with minimum of 4 GB RAM and .NET 4.7.1+ runtime
- If there is a firewall between your servers and Azure AD, configure the following items:
| Port number | How it’s used |
|---|---|
| 80 | Downloads the certificate revocation lists (CRLs) while validating the TLS/SSL certificate |
| 443 | Handles all outbound communication with the service |
| 8080 (optional) | Agents report their status every 10 minutes over port 8080, if port 443 is unavailable. This status is displayed on the Azure AD portal. |
- If your firewall or proxy allows you to specify safe suffixes, then add connections t to *.msappproxy.net and *.servicebus.windows.net. If not, allow access to the Azure datacenter IP ranges, which are updated weekly.
- Your agents need access to login.windows.net and login.microsoftonline.com for initial registration. Open your firewall for those URLs as well.
- For certificate validation, unblock the following URLs: mscrl.microsoft.com:80, crl.microsoft.com:80, ocsp.msocsp.com:80, and www.microsoft.com:80. Since these URLs are used for certificate validation with other Microsoft products you may already have these URLs unblocked.
Open Azure AD Connect page and choose Manage Azure AD cloud sync.

Nothing here, just download agent.
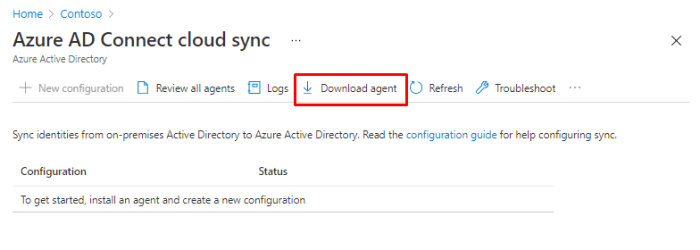
You have to login for download.

Once done, start install.
Installation


Azure portal configs


After done, You can scope users, groups or OU’s. You have to enter groups and OU’s as Canonical names, there is no browse possibility.

You can also map different attributes, just like with Azure AD Connect.

And validating the config with a user.

I hate when there is no browse option.

User Canonical name
Enable Advanced features.

Open user, properties and choose “Show only attributes that have values” not needed but make search easier.

And there You go.

copy / paste to Azure AD.

And success!


Set notification email and finally enable the sync.

You are sure and go.

Troubleshooting

You can debug the cloud sync agent from Provisioning logs.

Click to find more debugging info.

Implement and manage Password Hash Synchronization (PHS)
Cloud sync

Azure AD Connect


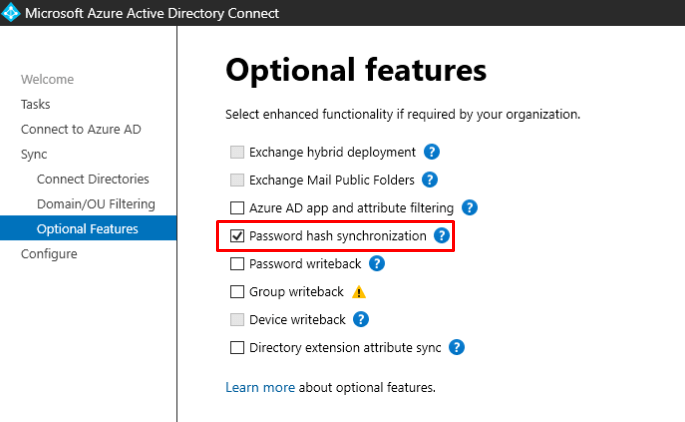
In the Optional features You can find PHS but it’s enabled by default.
If You want to check the password policies for a user, You can do it with the follwing
|
1 |
(Get-AzureADUser -objectID <User Object ID>).passwordpolicies |
And Enforce the cloud-based password policies.
|
1 |
Set-MsolDirSyncFeature -Feature EnforceCloudPasswordPolicyForPasswordSyncedUsers |
Once enforced, Azure AD does not go to each synchronized user to remove the DisablePasswordExpiration value from the PasswordPolicies attribute. Instead, the DisablePasswordExpiration value is removed from PasswordPolicies during the next password hash sync for each user, upon their next password change in on-premises AD.
To support temporary passwords in Azure AD for synchronized users, you can enable the ForcePasswordChangeOnLogOn feature, by running the following command on your Azure AD Connect server:
|
1 |
Set-ADSyncAADCompanyFeature -ForcePasswordChangeOnLogOn $true |
But You should enable Self-service Password reset (SSPR) before settings forced password changes.
In this menu You can also enabled Directory extension sync, which can be used ex. with Dynamic groups.


Things to remember
In both solutions the UserPrincipalName Suffix has to changed to match the Verified Custom Domain in the cloud to provide the rights sign-in name.
By default both solutions enable Password Hash Synchronization (PHS).
Here is the full list of differences compared by Microsoft.
Azure AD Connect:
- Is the most versatile syncing solution from these two.
- Support Exchange Hybrids, Cloud sync currently doesn’t
- Should be treated as Tier 0 server (More info)
- The first sync is called Initial and secondary is Delta. You can force Initial sync with Start-ADSyncSyncCycle -PolicyType Initial
- You must have an Azure AD Global Administrator account or Hybrid Identity Administrator rights in Azure.
Azure AD Cloud Sync:
- Can provisioning users and groups to On-premises AD with SCIM.
- Is a lightweight solution and it doesn’t have any database. All configuration files are in the cloud.
- You have to use an Group Managed Service Account (gMSA) for the agent.
- The common scenarios include merger & acquisition (where the acquired company’s AD forests are isolated from the parent company’s AD forests), and companies that have historically had multiple AD forests.
 RSS - Posts