This is section 3 and part 2. In this post I will be covering App registrations with the following topics.
- Create an App Registration
- Configure App Registration permission scopes
- Manage App Registration permission consent
Table of Contents
What is App registration in Azure?
With App registration You can register any application to Your tenant and provide authentication and authorization for that application.
When you create an application, you allow trust to be established between the application and the Microsoft identity platform. This trust is only unidirectional, the application trusts Microsoft platform but Microsoft platform doesn’t trust the app.
Tenants to choose from
The app can be registered inside Azure AD and You have the tenant options.
- Work and school (Azure AD) accounts or Microsoft accounts (such as Outlook.com and Live.com)
- Social and local (Azure AD B2C) accounts
Funny fact!

I don’t know why someone would make a tenant name longer or even close to 256 characters but that’s anyway the hard coded limit!
I won’t be covering B2C in this post as it isn’t part of AZ-500 scope, that’s a topic for another day.
Prerequisites
- An Azure account that has an active subscription. Create an account for free.
- The Azure account must have permission to manage applications in Azure Active Directory (Azure AD). Any of the following Azure AD roles include the required permissions:
Licensing
Free and basic Azure AD pricing tiers allow You to register 10 applications.
Azure AD Premium 1 and 2 allows registering unlimited apps per user.
Registering application
Search for App registration

In this page You can register the application or show Your own endpoints that can be used for connecting to Your published applications.

When You create an application You can choose from different options.

These are supported account types that You can use. If You want to publish the app to Your own users, choose “In this directory only” and if You want to allow any external users, select “Any organizational directory.
| Supported account types | Description |
|---|---|
| Accounts in this organizational directory only | Select this option if you’re building an application for use only by users (or guests) in your tenant. Often called a line-of-business (LOB) application, this app is a single-tenant application in the Microsoft identity platform. |
| Accounts in any organizational directory | Select this option if you want users in any Azure Active Directory (Azure AD) tenant to be able to use your application. This option is appropriate if, for example, you’re building a software-as-a-service (SaaS) application that you intend to provide to multiple organizations. This type of app is known as a multitenant application in the Microsoft identity platform. |
| Accounts in any organizational directory and personal Microsoft accounts | Select this option to target the widest set of customers. By selecting this option, you’re registering a multitenant application that can also support users who have personal Microsoft accounts. |
| Personal Microsoft accounts | Select this option if you’re building an application only for users who have personal Microsoft accounts. Personal Microsoft accounts include Skype, Xbox, Live, and Hotmail |
Redirect URI
A redirect URI is the location where the Microsoft identity platform redirects a user’s client and sends security tokens after authentication.
In a production web application, for example, the redirect URI is often a public endpoint where your app is running, like https://cloudpartnerdemo.fi/auth-response. During development, it’s common to also add the endpoint where you run your app locally, like https://127.0.0.1/auth-response or http://localhost/auth-response.
So now You app could look like this.

Platforms
Depending on the platform or device this application is targeting, additional configuration may be required such as redirect URIs, specific authentication settings, or fields specific to the platform.

| Platform | Configuration settings |
|---|---|
| Web | Enter a Redirect URI for your app. This URI is the location where the Microsoft identity platform redirects a user’s client and sends security tokens after authentication. Select this platform for standard web applications that run on a server. |
| Single-page application | Enter a Redirect URI for your app. This URI is the location where the Microsoft identity platform redirects a user’s client and sends security tokens after authentication. Select this platform if you’re building a client-side web app by using JavaScript or a framework like Angular, Vue.js, React.js, or Blazor WebAssembly. |
| iOS / macOS | Enter the app Bundle ID. Find it in Build Settings or in Xcode in Info.plist. A redirect URI is generated for you when you specify a Bundle ID. |
| Android | Enter the app Package name. Find it in the AndroidManifest.xml file. Also generate and enter the Signature hash. A redirect URI is generated for you when you specify these settings. |
| Mobile and desktop applications | Select one of the Suggested redirect URIs. Or specify a Custom redirect URI. For desktop applications using embedded browser, we recommend https://login.microsoftonline.com/common/oauth2/nativeclientFor desktop applications using system browser, we recommend http://localhostSelect this platform for mobile applications that aren’t using the latest Microsoft Authentication Library (MSAL) or aren’t using a broker. Also select this platform for desktop applications. |
Certificates or secrets?
You can use a certificates, client secret or Federated credentials (OpenID Connect)
I will go with secrets. You can create secret which will last up-to 24months but Microsoft recommends the maximum to be 12months.


Now is the only time You can copy the secret You just created, after this one it isn’t possible.

Application and object ID
In the overview page You can find Your App and Object ID’s, these are the one that Your software will connect to the apps.


App scope
In the Expose and API You can add permissions for the application.

Application ID URI
The App ID URI acts as the prefix for the scopes you’ll reference in your API’s code, and it must be globally unique. You can use the default value provided, which is in the form api://<application-client-id>, or specify a more readable URI like https://cloudpartnerdemo.fi/api.


Add a scope
From add a scope You can add permissions and who can consent to the permissions. Default is Admin only.

Once created, the scope will show in the page.

Client app
Next You will create a Client Demo app, This app will connect to the DemoApp we created in the earlier steps.
Then API permissions and Add a permissions

Go to My APIs to find the API we created in the earlier steps.

And You will see the Exposed permissions we created.
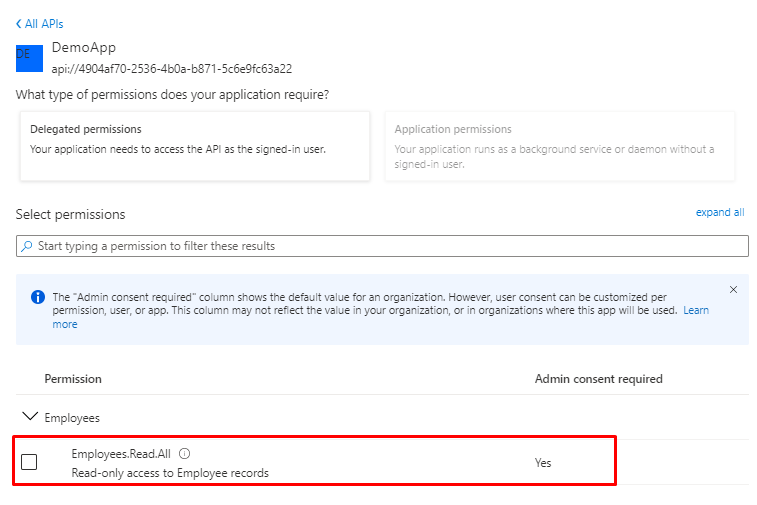
But You will see there is no consent for the app, click Grant admin consent

And select yes

But if You don’t have Admin rights the Grant admin consent button is disabled if you aren’t an admin or if no permissions have been configured for the application. If you have permissions that have been granted but not yet configured, the admin consent button prompts you to handle these permissions. You can add them to configured permissions or remove them.
Microsoft Graph
If You go browse App a permission again, You will see lot’s of different APIs. From here You could add permissions for Microsoft Graph.
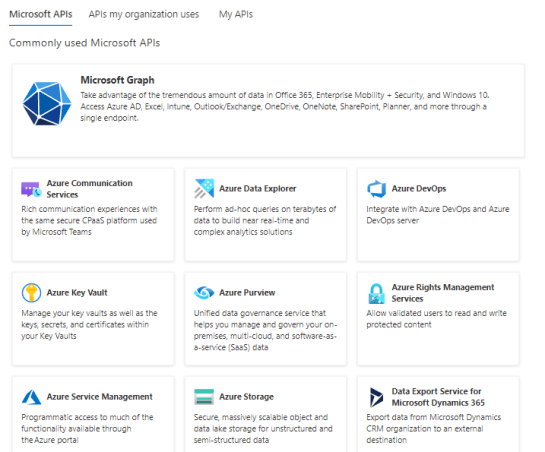
You have to options to add permissions.

Customizing App
In the Branding & properties You can find the logo and name that will be provided in the MyApps portal and External Azure Enterprise Applications collection.
You can also update Your custom domain here, if any. And add Publisher verification.
Publisher verification has to be the Microsoft Partner Network ID that have the same domain than the Custom Domain in the Publisher domain has.

Manifest
You can see the config that we just created in the manifest as JSON. You can download, edit it and upload to a different App or just as backup.

If You are interested in the Manifest and it’s possibilities, I wrote a post about this one also.
Things to remember
Free and Basic Azure offers have a limit of 10 apps per user. Azure P1 and P2 don’t have any limit.
Web API has Exposed API and the client have API permissions.
Differences between Application and Object ID:
An app registration in Azure AD results in an Application object. All objects in Azure AD have an object ID. When you making an API request to address a specific Application object, you would use the object ID:
An Application object’s object ID is only relevant in the same tenant where the app is registered, and is only ever used to identify that object.
An Application objects Application ID attribute is used used across tenants, and on more than one object type. There are two primary uses:
- To identify the app in various sign-in and token flows (e.g.
client_idin OAuth 2.0 and OpenID Connect). - To uniquely identify the backing Application object of a ServicePrincipal object. (Think of the ServicePrincipal object as the “instance” of the app in a given Azure AD tenant.)
Different platform options.
Understand the different Microsoft identity platform concepts. https://docs.microsoft.com/en-us/azure/active-directory/develop/developer-glossary
 RSS - Posts